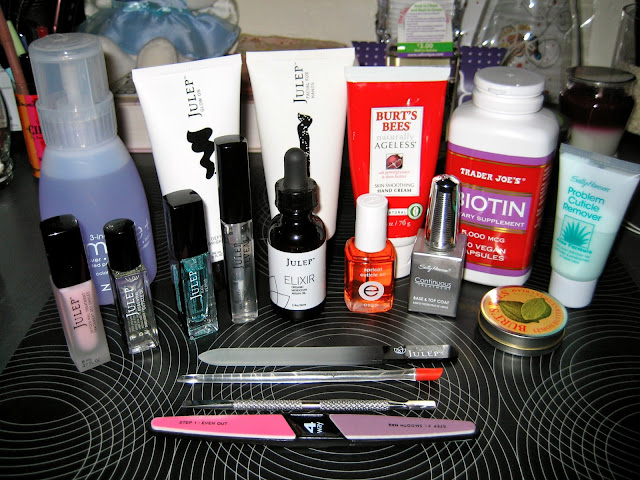
Four Weeks to Beautiful Nails
I had hoped to start blogging my Manicure Mondays this week but two things happened:
1. It was Earth Day on Monday
2. My nails are a disaster right now
My nails are splitting, peeling, and cracking which means some major TLC is needed, and so I have devised a four week plan to get my nails back into shape.
Step 1: Remove chipped old polish. I like to use Zoya Remove Plus Nail Polish Remover because the mild acetone formula will remove stubborn glitter polish, it's moisturizing and it smells like lavender. You can also use this to prep your nails before polishing.
Step 2: Clip nails short to remove damage then file nails using a crystal nail file because it is more gentle and lasts longer than an emery board nail file. You can get a crystal or glass nail file online or at a beauty supply store. There are many methods of filing your nails; Some recommend filing from the outside toward the center from each side of the nail and others recommend filing in only one direction. I prefer the later because it is easiest for me to achieve a square shape which is what I prefer when I have short nails. When my nails are longer I round the edges to make a squoval shape (square plus oval equals squoval.)
Step 3: Clean up cuticles by using a cuticle remover. Cuticle remover is different from cuticle cream in that it softens cuticles so that you can push them back with a cuticle stick. It also causes stubborn cuticle bits that have stuck to your nail bed to rub/scrape off. A cuticle cream simply moisturizes your cuticles so you don't get hang nails. The cuticle remover cream I use is Sally Hansen Problem Cuticle Remover. After using the remover push back cuticles with the cuticle stick (I have two, one is plastic with a rubber tip and the other is metal); It's up to you which type you prefer.
Step 4: Buff nails with a buffing block to prevent ridges and to even out the spots that peeled off. Get it damp and then gently brush it back and forth over the nail bed being careful of the cuticles.
Step 5: Soak hands in warm water with oil for 5 minutes to moisturize and nourish hands and nails. I use Julep Elixir which contains Argan oil. Rub the oil into cuticles and nails before drying hands.
Step 6: Use a nail strengthener. I am using Julep Oxygen Nail Treatment. This treatment allows oxygen to get to your nails through a coat of sheer light pink color. This is supposed to help nail growth and repair. I am also using Julep Reveal Nail Growth Revitalizing Serum which comes in a set with Julep Therapy Base Coat. You brush the serum on cuticles and under the front of the nail twice a day to encourage healthy growth. As an alternative you can use the cult classic OPI Nail Envy or a cheaper drugstore alternative Sally Hansen Continuous Treatment Base & Top Coat which is what my local salon uses.
Step 7: Moisturize nails again using cuticle oil. Do this twice a day. I like Julep Cuticle Oil because it comes in a roll-on container for less mess. You can also try Essie Apricot Cuticle Oil which you brush on your cuticles with a nail polish brush applicator. I also use Burt's Bees Lemon Butter Cuticle Cream when I am at work because it absorbs fast so I am not getting my paperwork all oily.
Step 8: Use hand moisturizer. I like to use the combination of Julep Glycolic Hand Scrub and Julep Age Defying Hand Brightener. I use these twice a day. I also like Burt's Bees Naturally Ageless Skin Smoothing Hand Cream. I stash Philosophy Hands of Hope Hand and Cuticle Cream in my purse for times when I need extra moisture.
Step 9: Lastly, I take Biotin supplements for healthy hair, skin, and nails. I'm not one hundred percent sure this works but it can't hurt to try since I am otherwise healthy. I am also going to eat a lot of gelatin because I have read that it can also help with nail growth. If not, at least I got to eat some yummy Jell-O.


Comments
Post a Comment